
建站笔记(十一)
博客详情页面显示
博客详情页面包括文章内容和评论部分,本文将从文章内容显示和评论功能来讲述SpringBoot搭建个人博客的详情页面显示,由于博客详情和评论功能都是独立的,这里将评论单独用一个类来编写接口,查询博客详情就直接放在首页的控制器进行处理
分析:
问:博客详情页面是包含文章内容和评论部分,要如何处理
答:在跳转博客详情页面的时候,可以返回两个model,一个是文章详情内容,一个是评论列表
问:文章详情内容如何处理,需要哪些接口?评论如何处理,又需要哪些接口?
答:文章详情内容定义getDetailedBlog博客详情接口,需要定义一个查询实体类来封装一下查询内容,并把分类信息也包含进来;评论功能则需要定义listCommentByBlogId查询评论列表接口、saveComment新增保存接口、deleteComment删除接口
一、文章内容显示
分析:
问:在博客详情页面中,文章显示格式要如何处理,文章访问数量如何处理,评论数量又该如何处理?
答:这些都在getDetailedBlog接口实现类中实现
- 文章显示格式:使用开源的Markdown编辑器:Editor,调用工具类方法来增加扩展
- 访问数量:在持久层接口定义方法updateViews来更新文章访问数量,点击文章后数值自增
- 评论数量:在持久层接口定义方法getCommentCountById来根据博客id查询出评论数量
1. 博客详情实体类
博客详情除了显示博客信息外,还需要显示分类信息,所以还要创建分类名称属性,在queryvo包下创建DetailedBlog博客详情实体类,代码如下:
package com.cbx.queryvo;

import lombok.AllArgsConstructor;
import lombok.Data;
import lombok.NoArgsConstructor;

import java.util.Date;

/**
 * @author cbx
 * @date 2022/3/3
 * @apiNote 博客详情实体类
 */
@Data
@NoArgsConstructor
@AllArgsConstructor
public class DetailedBlog {

    private Long id;
    private String firstPicture;
    private String flag;
    private String title;
    private String content;

    private Integer views;
    private Integer commentCount;
    private Date updateTime;
    private boolean commentabled;
    private boolean shareStatement;
    private boolean appreciation;
    private String nickname;
    private String avatar;

    //Type
    private String typeName;

}
2. Markdown编辑器工具类
- 添加依赖Editor相关依赖
在pom.xml中添加
<dependency>
    <groupId>com.atlassian.commonmark</groupId>
    <artifactId>commonmark</artifactId>
    <version>0.10.0</version>
</dependency>

<dependency>
    <groupId>com.atlassian.commonmark</groupId>
    <artifactId>commonmark-ext-heading-anchor</artifactId>
    <version>0.10.0</version>
</dependency>

<dependency>
    <groupId>com.atlassian.commonmark</groupId>
    <artifactId>commonmark-ext-gfm-tables</artifactId>
    <version>0.10.0</version>
</dependency>
- 添加MarkdownUtils工具类
在util工具包下添加MarkdownUtils工具类:
package com.cbx.util;

import org.commonmark.Extension;
import org.commonmark.ext.gfm.tables.TableBlock;
import org.commonmark.ext.gfm.tables.TablesExtension;
import org.commonmark.ext.heading.anchor.HeadingAnchorExtension;
import org.commonmark.node.Link;
import org.commonmark.node.Node;
import org.commonmark.parser.Parser;
import org.commonmark.renderer.html.AttributeProvider;
import org.commonmark.renderer.html.AttributeProviderContext;
import org.commonmark.renderer.html.AttributeProviderFactory;
import org.commonmark.renderer.html.HtmlRenderer;

import java.util.*;

/**
 * @Description: Markdown编辑器
 * @author cbx
 * @date 2022/3/4
 * @apiNote
 */
public class MarkdownUtils {

    /**
     * markdown格式转换成HTML格式
     * @param markdown
     * @return
     */
    public static String markdownToHtml(String markdown) {
        Parser parser = Parser.builder().build();
        Node document = parser.parse(markdown);
        HtmlRenderer renderer = HtmlRenderer.builder().build();
        return renderer.render(document);
    }

    /**
     * 增加扩展[标题锚点,表格生成]
     * Markdown转换成HTML
     * @param markdown
     * @return
     */
    public static String markdownToHtmlExtensions(String markdown) {
        //h标题生成id
        Set<Extension> headingAnchorExtensions = Collections.singleton(HeadingAnchorExtension.create());
        //转换table的HTML
        List<Extension> tableExtension = Arrays.asList(TablesExtension.create());
        Parser parser = Parser.builder()
                .extensions(tableExtension)
                .build();
        Node document = parser.parse(markdown);
        HtmlRenderer renderer = HtmlRenderer.builder()
                .extensions(headingAnchorExtensions)
                .extensions(tableExtension)
                .attributeProviderFactory(new AttributeProviderFactory() {
                    public AttributeProvider create(AttributeProviderContext context) {
                        return new CustomAttributeProvider();
                    }
                })
                .build();
        return renderer.render(document);
    }

    /**
     * 处理标签的属性
     */
    static class CustomAttributeProvider implements AttributeProvider {
        @Override
        public void setAttributes(Node node, String tagName, Map<String, String> attributes) {
            //改变a标签的target属性为_blank
            if (node instanceof Link) {
                attributes.put("target", "_blank");
            }
            if (node instanceof TableBlock) {
                attributes.put("class", "ui celled table");
            }
        }
    }


    public static void main(String[] args) {
        String table = "| hello | hi   | 哈哈哈   |\n" +
                "| ----- | ---- | ----- |\n" +
                "| 斯维尔多  | 士大夫  | f啊    |\n" +
                "| 阿什顿发  | 非固定杆 | 撒阿什顿发 |\n" +
                "\n";
        String a = "[くりやまさん](http://120.25.193.163/)";
        System.out.println(markdownToHtmlExtensions(a));
    }

}
3. 持久层接口
文章内容显示是从首页点击文章标题或图片,然后跳转到博客详情页面的,所以这里就将代码放在博客业务这一块
在BlogDao接口中添加查询博客详情、文章访问更新、查询评论数量接口
//查询博客详情
DetailedBlog getDetailedBlog(Long id);

//文章访问更新
int updateViews(Long id);

//根据博客id查询出评论数量
int getCommentCountById(Long id);
4. mapper
根据持久层接口,编写如下SQL:查询博客详情、文章访问更新、查询评论数量,这里需要对博客详情进行封装
<resultMap id="detailedBlog" type="com.cbx.queryvo.DetailedBlog">
    <id property="id" column="bid"/>
    <result property="firstPicture" column="first_picture"/>
    <result property="flag" column="flag"/>
    <result property="title" column="title"/>
    <result property="content" column="content"/>
    <result property="typeName" column="name"/>
    <result property="views" column="views"/>
    <result property="commentCount" column="comment_count"/>
    <result property="updateTime" column="update_time"/>
    <result property="commentabled" column="commentabled"/>
    <result property="shareStatement" column="share_statement"/>
    <result property="appreciation" column="appreciation"/>
    <result property="nickname" column="nickname"/>
    <result property="avatar" column="avatar"/>
</resultMap>


<!--查询详情博客列表-->
<select id="getDetailBlog" resultMap="detailedBlog">
    select b.id bid,b.first_picture,b.flag,b.title,b.content,t.name,b.views,
           b.comment_count,b.update_time,b.commentabled,b.share_statement,b.appreciation,
           u.nickname,u.avatar from myblog.t_blog b,myblog.t_type t,myblog.t_user u
           where b.type_id = t.id and b.user_id = u.id and b.id = #{id}
</select>

<!--根据博客id查询出评论数量-->
<update id="getCommentCountById" parameterType="com.cbx.entity.Blog">
      update myblog.t_blog b set b.comment_count = (
      select count(*) from myblog.t_comment c where c.blog_id = #{id}
      ) where b.id = #{id}
</update>

<!-- 文章访问更新-->
<update id="updateViews" parameterType="com.cbx.entity.Blog">
     update myblog.t_blog b set b.views = b.views + 1 where b.id = #{id}
</update>
5. 持久层
- 持久层接口
在BlogService接口中添加查询博客详情方法:
//查询博客详情
DetailedBlog getDetailedBlog(Long id);
- 接口实现
接口实现主要是设置文章显示格式,文章访问自增和文章评论的统计,在BlogServiceImpl类中添加实现方法,如下:
@Override
public DetailedBlog getDetailedBlog(Long id) {
    DetailedBlog detailedBlog = blogDao.getDetailedBlog(id);
    if (detailedBlog == null) {
        throw new NotFoundException("该博客不存在");
    }
    String content = detailedBlog.getContent();
    detailedBlog.setContent(MarkdownUtils.markdownToHtmlExtensions(content));
    //文章访问数量自增
    blogDao.updateViews(id);
    //文章评论数量更新
    blogDao.getCommentCountById(id);
    return detailedBlog;
}
6. 控制器
在IndexController类中添加方法,调用业务层接口:
//跳转博客详情页面
@GetMapping("/blog/{id}")
public String blog(@PathVariable Long id, Model model) {
    DetailedBlog detailedBlog = blogService.getDetailedBlog(id);
    model.addAttribute("blog", detailedBlog);


    return "blog";
}
二、评论功能
由于评论稍微复杂些,这里将评论单独放一个业务层
分析:
问:评论业务层需要哪些接口?
答:评论直接在前端页面上进行操作,没有后台管理,只是区分的管理员和普通用户,管理员可以对评论进行删除,因此需要查询评论列表(listCommentByBlogId)、添加保存评论(saveComment)、删除评论(deleteComment)接口
问:业务层这些接口够了,但持久层光这些够了吗?需要哪些SQL,需要哪些持久层接口呢?
答:持久层接口肯定是不够的,主要是查询评论列表的时候,需要将评论和回复加以区分,根据评论功能来看,有父评论、子评论(回复),并且父子评论在前端显示的位置有不同,这里细说一下查询:
- 根据id为“-1”和博客id查询出所有父评论(父级评论id为‘-1’)
- 根据父评论的id查询出一级子回复
- 根据子回复的id循环迭代查询出所有子集回复
- 将查询出来的子回复放到一个集合中
所以查询评论信息需要:查询父级评论(findByBlogIdParentIdNull)、查询一级回复(findByBlogIdParentIdNotNull)、查询二级回复(findByBlogIdAndReplayId)
1. 持久层接口
在dao包下创建CommentDao接口,添加如下接口:
package com.cbx.dao;

import com.cbx.entity.Comment;
import org.apache.ibatis.annotations.Mapper;
import org.apache.ibatis.annotations.Param;
import org.springframework.stereotype.Repository;

import java.util.List;

/**
 * @author cbx
 * @date 2022/3/6
 * @apiNote 评论持久层接口
 */
@Mapper
@Repository
public interface CommentDao {

    // 查询父级评论
    List<Comment> findByBlogIdParentIdNull(@Param("blogId") Long blogId,@Param("blogParentId") Long blogParentId);

    // 查询一级回复
    List<Comment> findByBlogIdParentIdNotNull(@Param("blogId")Long blogId,@Param("id")Long id);

    // 查询二级回复
    List<Comment> findByBlogIdAndReplayId(@Param("blogId")Long blogId,@Param("childId")Long childId);

    // 添加一个评论
    int saveComment(Comment comment);

    // 删除评论
    void deleteComment(Long id);

}
2.mapper
在mapper目录下创建CommentDao.xml文件,添加如下:
<?xml version="1.0" encoding="utf-8" ?>
<!DOCTYPE mapper PUBLIC "-//mybatis.org//DTD Mapper 3.0//EN" "http://mybatis.org/dtd/mybatis-3-mapper.dtd" >
<mapper namespace="com.cbx.dao.CommentDao">
    <!--添加一个评论-->
    <insert id="saveComment" parameterType="com.cbx.entity.Comment">
        insert into myblog.t_comment  (nickname,email,content,avatar,create_time,blog_id,parent_comment_id,admin_comment)
        values (#{nickname},#{email},#{content},#{avatar},#{createTime},#{blogId},#{parentCommentId},#{adminComment})
    </insert>

    <!--删除评论-->
    <delete id="deleteComment">
        delete from myblog.t_comment where id = #{id}
    </delete>

    <!--查询父级评论-->
    <select id="findByBlogIdParentIdNull" resultType="com.cbx.entity.Comment">
        select *
        from myblog.t_comment c
        where c.blog_id = #{blogId} and c.parent_comment_id = #{blogParentId}
        order by c.create_time desc
    </select>

    <!--查询一级回复-->
    <select id="findByBlogIdParentIdNotNull" resultType="com.cbx.entity.Comment">
        select *
        from myblog.t_comment c
        where c.blog_id = #{blogId} and c.parent_comment_id = #{id}
        order by c.create_time desc
    </select>

    <!--查询二级回复-->
    <select id="findByBlogIdAndReplayId" resultType="com.cbx.entity.Comment">
        select *
        from myblog.t_comment c
        where c.blog_id = #{blogId} and c.parent_comment_id = #{childId}
        order by c.create_time desc
    </select>


</mapper>
讲解:
添加删除:直接使用insert和delete即可进行添加和删除
查询:
- findByBlogIdParentIdNull:根据id为“-1”和博客id查询出所有父评论(父级评论id为‘-1’)
- findByBlogIdParentIdNotNull:根据父评论的id查询出一级子回复
- findByBlogIdAndReplayId:根据子回复的id循环迭代查询出所有子集回复
3. 业务层
- 业务层接口:
在service包下创建CommentService接口,如下:
package com.cbx.service;

import com.cbx.entity.Comment;

import java.util.List;

/**
 * @author cbx
 * @date 2022/3/6
 * @apiNote 评论业务层接口
 */

public interface CommentService {

    // 根据博客id查询评论信息
    List<Comment> listCommentByBlogId(Long blogId);

    // 添加保存评论
    int saveComment(Comment comment);

    // 删除评论
    void deleteComment(Comment comment,Long id);

}
- 接口实现:
在Impl包下创建接口实现类:CommentServiceImpl,功能都在这个接口中实现
package com.cbx.service.impl;

import com.cbx.dao.BlogDao;
import com.cbx.dao.CommentDao;
import com.cbx.entity.Comment;
import com.cbx.service.CommentService;
import org.springframework.beans.factory.annotation.Autowired;
import org.springframework.stereotype.Service;
import org.springframework.transaction.annotation.Transactional;

import java.util.ArrayList;
import java.util.Date;
import java.util.List;

/**
 * @author cbx
 * @date 2022/3/6
 * @apiNote 博客评论业务层接口实现类
 */
@Service
public class CommentServiceImpl implements CommentService {

    @Autowired
    private CommentDao commentDao;

    @Autowired
    private BlogDao blogDao;

    //存放迭代找出的所有子代的集合
    private List<Comment> temReplys = new ArrayList<>();

    /**
     * 查询评论
     * @param blogId
     * @return 评论消息
     */
    @Override
    public List<Comment> listCommentByBlogId(Long blogId) {
        // 查询父节点
        List<Comment> comments = commentDao.findByBlogIdParentIdNull(blogId, Long.parseLong("-1"));
        for (Comment comment : comments) {
            Long id = comment.getId();
            String parentNickname = comment.getNickname();
            // 查询一级回复
            List<Comment> childComment = commentDao.findByBlogIdParentIdNotNull(blogId, id);
            // 查询出子评论
            combineChildren(blogId,childComment,parentNickname);
            comment.setReplyComments(temReplys);
            temReplys = new ArrayList<>();
        }
        return comments;
    }

    /**
     * 查询出子评论
     * @param blogId
     * @param childComments 所有子评论
     * @param parentNickname 父评论姓名
     */
    private void combineChildren(Long blogId,List<Comment> childComments,String parentNickname){
        // 判断是否有一级子评论
        if (childComments.size() > 0){
            // 循环找出子评论的id
            for (Comment childComment : childComments) {
                String nickname = childComment.getNickname();
                childComment.setParentNickname(parentNickname);
                temReplys.add(childComment);
                Long childId = childComment.getId();
                // 查询出二级子评论
                recursively(blogId,childId,nickname);
            }
        }
    }

    /**
     * 循环迭代找出子集回复
     * @param blogId
     * @param childId 上一级子评论id
     * @param parentNickname 上一级子评论姓名
     */
    private void recursively(Long blogId,Long childId,String parentNickname){
        // 根据子一级评论的id找到子二级评论
        List<Comment> replyComments = commentDao.findByBlogIdAndReplayId(blogId, childId);
        if (replyComments.size() > 0){
            for (Comment replyComment : replyComments) {
                String nickname = replyComment.getNickname();
                replyComment.setParentNickname(parentNickname);
                Long replyId = replyComment.getId();
                temReplys.add(replyComment);
                // 往下再继续找三级的..以此类推
                recursively(blogId,replyId,nickname);
            }
        }
    }

    // 新增评论
    @Override
    @Transactional
    public int saveComment(Comment comment) {
        comment.setCreateTime(new Date());
        int i = commentDao.saveComment(comment);
        // 博客评论计数增加更新
        blogDao.getCommentCountById(comment.getBlogId());
        return i;
    }

    // 删除评论
    @Override
    @Transactional
    public void deleteComment(Comment comment, Long id) {
        commentDao.deleteComment(id);
        // 博客评论计数减少更新
        blogDao.getCommentCountById(comment.getBlogId());
    }
}
4. 控制器
- 添加图片配置 在评论中,需要显示头像,这里直接在配置文件里面进行配置,在application.yml中添加如下配置(这里直接把后面留言的显示图片也一起添加了):
comment.avatar: /images/avatar.png
message.avatar: /images/avatar.png
在controller包下创建CommentController类,如下:
package com.cbx.controller;

import com.cbx.entity.Comment;
import com.cbx.entity.User;
import com.cbx.queryvo.DetailedBlog;
import com.cbx.service.BlogService;
import com.cbx.service.CommentService;
import org.springframework.beans.factory.annotation.Autowired;
import org.springframework.beans.factory.annotation.Value;
import org.springframework.stereotype.Controller;
import org.springframework.ui.Model;
import org.springframework.web.bind.annotation.GetMapping;
import org.springframework.web.bind.annotation.PathVariable;
import org.springframework.web.bind.annotation.PostMapping;
import org.springframework.web.servlet.mvc.support.RedirectAttributes;

import javax.servlet.http.HttpSession;
import java.util.List;

/**
 * @author cbx
 * @date 2022/3/6
 * @apiNote 评论控制器
 */
@Controller
public class CommentController {

    @Autowired
    private CommentService commentService;

    @Autowired
    private BlogService blogService;

    @Value("${comment.avatar}")
    private String avatar;

    // 查询评论列表
    @GetMapping("/comments/{blogId}")
    public String comments(@PathVariable Long blogId, Model model){
        List<Comment> comments = commentService.listCommentByBlogId(blogId);
        model.addAttribute("comments",comments);
        return "blog :: commentList";
    }

    // 新增评论
    @PostMapping("/comments")
    public String post(Comment comment, HttpSession session,Model model){
        Long blogId = comment.getBlogId();
        User user = (User) session.getAttribute("user");
        if (user != null){
            comment.setAvatar(user.getAvatar());
            comment.setAdminComment(true);
        }else {
            // 设置头像
            comment.setAvatar(avatar);
        }

        if (comment.getParentComment().getId() != null){
            comment.setParentCommentId(comment.getParentComment().getId());
        }

        commentService.saveComment(comment);
        List<Comment> comments = commentService.listCommentByBlogId(blogId);
        model.addAttribute("comments",comments);
        return "blog :: commentList";
    }

    // 删除评论
    @GetMapping("/comment/{blogId}/{id}/delete")
    public String delete(@PathVariable Long blogId, @PathVariable Long id, Comment comment,Model model){
        commentService.deleteComment(comment,id);// 删除评论并通过comment.getBlogId来更新博客的评论计数减少
        DetailedBlog detailedBlog = blogService.getDetailedBlog(blogId);
        List<Comment> comments = commentService.listCommentByBlogId(blogId);
        model.addAttribute("blog",detailedBlog);
        model.addAttribute("comments",comments);
        return "blog"; // 相当与刷新博客页面
    }
}
讲解:
查询评论列表:调用接口查询评论信息列表,局部刷新评论信息
新增评论:对评论进行判断,区分游客和管理员
删除评论:将博客id和评论id参数传入,判断删除的是哪一条评论,这里没有做迭代删除子评论,若删除了含有回复的评论,根据之前的查询来看,在前端回复也不会查询出来,但回复并没有删除,依然在数据库里面,删除的只是父评论
5. 前后端交互
提交评论
- HTML
<input type="hidden" name="blogId" th:value="${blog.id}">
<input type="hidden" name="parentComment.id" value="-1">
<div class="field">
<textarea name="content" placeholder="请输入评论信息..."></textarea>
</div>
<div class="fields">
<div class="field m-mobile-wide m-margin-bottom-small">
  <div class="ui left icon input">
    <i class="user icon"></i>
    <input type="text" name="nickname" placeholder="姓名" th:value="${session.user}!=null ? ${session.user.nickname}">
  </div>
</div>
<div class="field m-mobile-wide m-margin-bottom-small">
  <div class="ui left icon input">
    <i class="mail icon"></i>
    <input type="text" name="email" placeholder="邮箱" th:value="${session.user}!=null ? ${session.user.email}">
  </div>
</div>
<div class="field  m-margin-bottom-small m-mobile-wide">
  <button id="commentpost-btn" type="button" class="ui teal button m-mobile-wide"><i class="edit icon"></i>发布</button>
</div>
</div>
- JS
<script th:inline="javascript">
    ....
</script>
thymeleaf的内联th:inline(在javascript访问model中的数据)
<p>Hello, [[${session.user.name}]]!</p>
当页面加载完成之后,需要把评论都给加载出来,即访问@{/comments/{id}(id=${blog.id})}这个接口,加载评论列表数据
$(function () {
    $("#comment-container").load(/*[[@{/comments/{id}(id=${blog.id})}]]*/"comments/6");
});
点击@回复后的js,所回复的评论的id将作为该条回复评论的父评论id
    function reply(obj) {
        var commentId = $(obj).data('commentid');
        var commentNickname = $(obj).data('commentnickname');
        $("[name='content']").attr("placeholder", "@"+commentNickname).focus();
        $("[name='parentComment.id']").val(commentId);
        $(window).scrollTo($('#comment-form'),500);
    }
$('#commentpost-btn').click(function () {
    var boo = $('.ui.form').form('validate form');
    if (boo) {
        console.log('校验成功');
        postData();
    } else {
        console.log('校验失败');
    }
});

function postData() {
    $("#comment-container").load(/*[[@{/comments}]]*/"",{
        "parentComment.id" : $("[name='parentComment.id']").val(),
        "blogId" : $("[name='blogId']").val(),
        "nickname": $("[name='nickname']").val(),
        "email"   : $("[name='email']").val(),
        "content" : $("[name='content']").val()
    },function (responseTxt, statusTxt, xhr) {
        $(window).scrollTo($('#goto'),500);
        clearContent();
    });
}
评论列表
<div id="comment-container" class="ui teal segment">
<div th:fragment="commentList">
<div class="ui threaded comments" style="max-width: 100%;">
<h3 class="ui dividing header">评论</h3>
<div class="comment" th:each="comment : ${comments}">
<a class="avatar">
<img src="https://unsplash.it/100/100?image=1005" th:src="@{${comment.avatar}}">
</a>
<div class="content">
<a class="author" >
<span th:text="${comment.nickname}">Matt</span>
<div class="ui mini basic teal left pointing label m-padded-mini" th:if="${comment.adminComment}">栈主</div>
</a>
<div class="metadata">
<span class="date" th:text="${#dates.format(comment.createTime,'yyyy-MM-dd HH:mm')}">Today at 5:42PM</span>
</div>
<div class="text" th:text="${comment.content}">
How artistic!
</div>
<div class="actions">
<a class="reply" data-commentid="1" data-commentnickname="Matt" th:attr="data-commentid=${comment.id},data-commentnickname=${comment.nickname}" onclick="reply(this)">回复</a>
<a class="delete" href="#" th:href="@{/comment/{param1}/{param2}/delete(param1=${comment.blogId},param2=${comment.id})}" onclick="return confirm('确定要删除该评论吗?三思啊! 删了可就没了!')" th:if="${session.user}">删除</a>
<!--<a class="delete" href="#" th:href="@{/comment/{id}/delete(id=${comment.id})}" onclick="return confirm('确定要删除该评论吗?三思啊! 删了可就没了!')" th:if="${session.user}">删除</a>-->
</div>
</div>
<!--子集评论-->
<div class="comments" th:if="${#arrays.length(comment.replyComments)}>0">
<div class="comment" th:each="reply : ${comment.replyComments}">
<a class="avatar">
<img src="https://unsplash.it/100/100?image=1005" th:src="@{${reply.avatar}}">
</a>
<div class="content">
<a class="author" >
<span th:text="${reply.nickname}">小红</span>
<div class="ui mini basic teal left pointing label m-padded-mini" th:if="${reply.adminComment}">栈主</div>
<span th:text="|@ ${reply.parentNickname}|" class="m-teal">@ 小白</span>
</a>
<div class="metadata">
<span class="date" th:text="${#dates.format(reply.createTime,'yyyy-MM-dd HH:mm')}">Today at 5:42PM</span>
</div>
<div class="text" th:text="${reply.content}">
How artistic!
</div>
<div class="actions">
<a class="reply" data-commentid="1" data-commentnickname="Matt" th:attr="data-commentid=${reply.id},data-commentnickname=${reply.nickname}" onclick="reply(this)">回复</a>
<a class="delete" href="#" th:href="@{/comment/{param1}/{param2}/delete(param1=${reply.blogId},param2=${reply.id})}" onclick="return confirm('确定要删除该评论吗?三思啊! 删了可就没了!')" th:if="${session.user}">删除</a>
<!--<a class="delete" href="#" th:href="@{/comment/{id}/delete(id=${reply.id})}" onclick="return confirm('确定要删除该评论吗?三思啊! 删了可就没了!')" th:if="${session.user}">删除</a>-->
</div>
</div>
</div>
</div>
</div>
</div>
</div>
</div>
注意上面的点击@回复的时候触发的onclick事件reply(this),我的理解是即将当前这段标签里面的data数据封装成一个对象obj发送给后面的js函数,即 function reply(obj),这个函数通过$(obj).data('commentid'),$(obj).data('commentnickname')可以获取到我们当前回复的评论的id以及评论人的昵称数据,进而进行操作。
使用thymeleafa时候如果要hidden某些数据或者要在js里面冬天获取某些数据,我们可以使用th:attr 将数据作为html标签的一个属性存起来
例如:
 <div id="cityBtn" class="btn" th:attr="data-cityId=${cityId}" th:text="${cityName}">上海
   <span class="fa fa-angle-down"></span>
 </div>
其中的 cityId是我们要保存起来的数据,然后就可以在js里面使用了。
使用方式为:
var cityId = $("#cityBtn").data("cityid");
如果是有多个属性要hidden,只需要用逗号隔开就可以了:
<div id="cityBtn" class="btn" th:attr="data-cityId=${cityId}, data-regionId=${regionId}" th:text="${cityName}"" >上海
<span class="fa fa-angle-down"></span>
</div>
三、运行访问
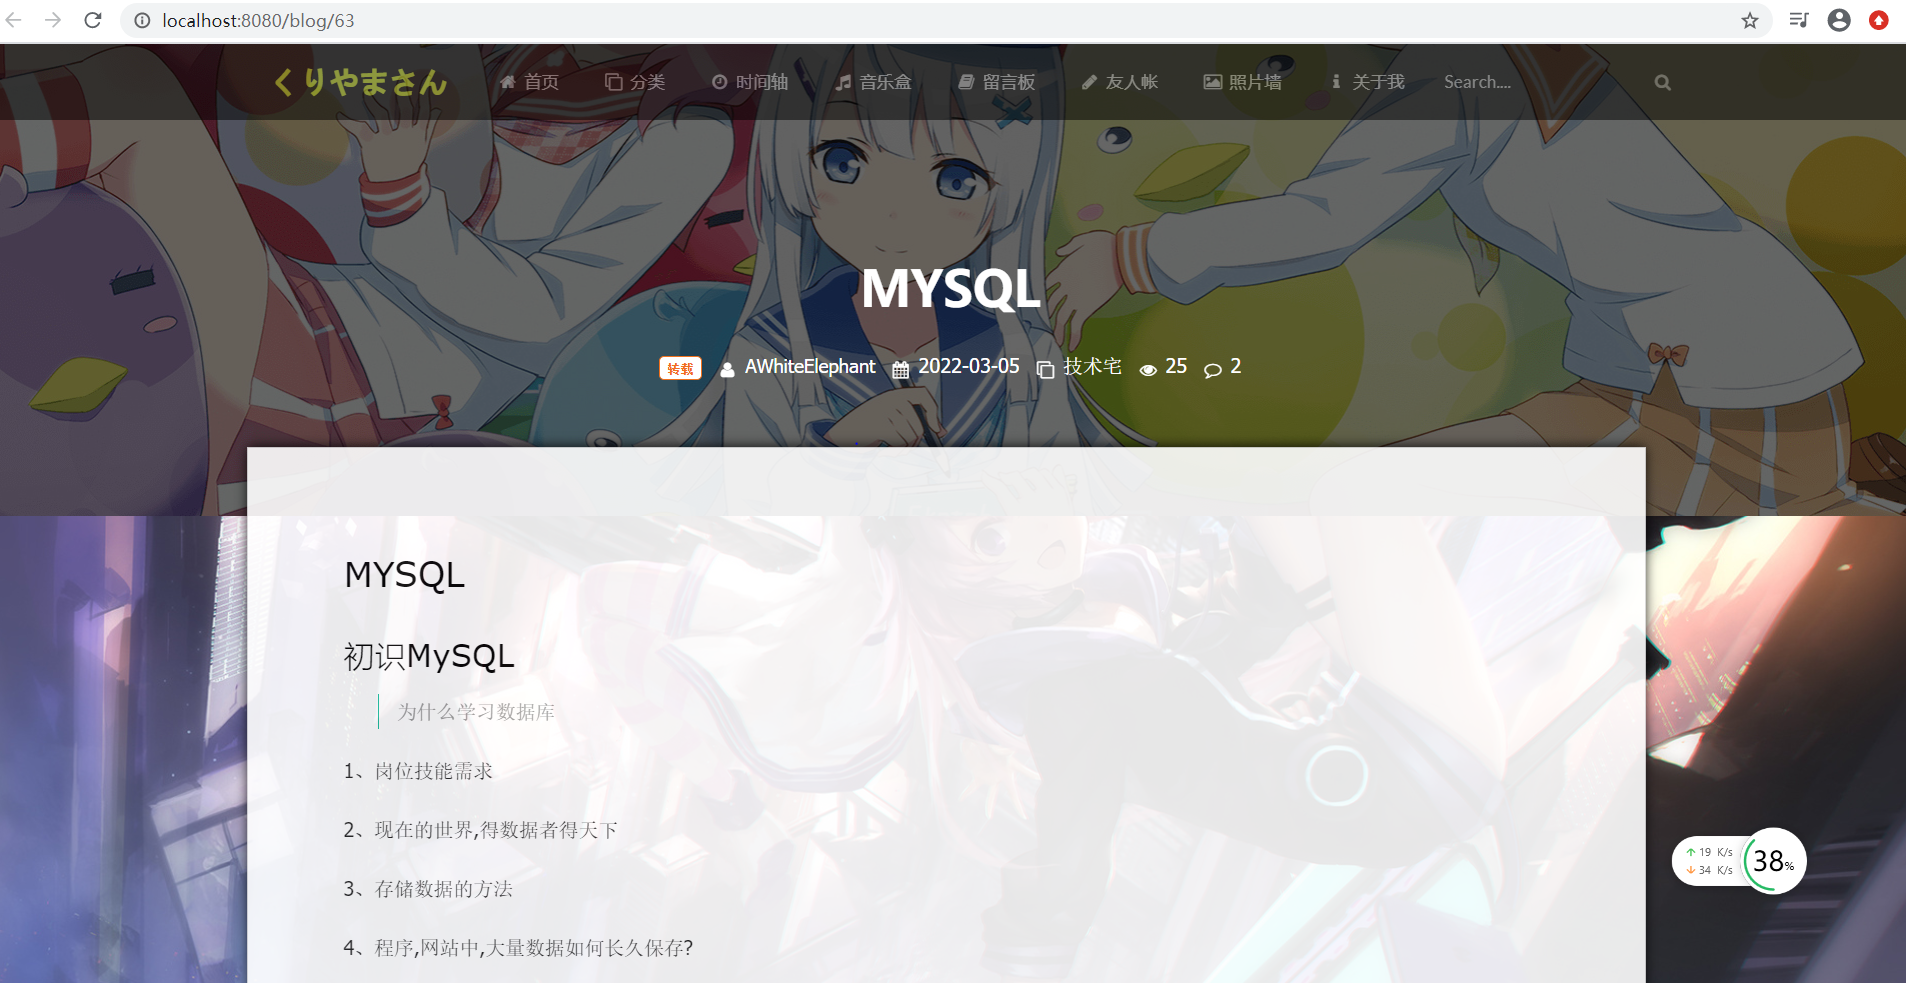
运行项目,访问 http://localhost:8080/, 点击一片文章,可以查看文章信息,并能进行评论,登录后可以对评论进行删除
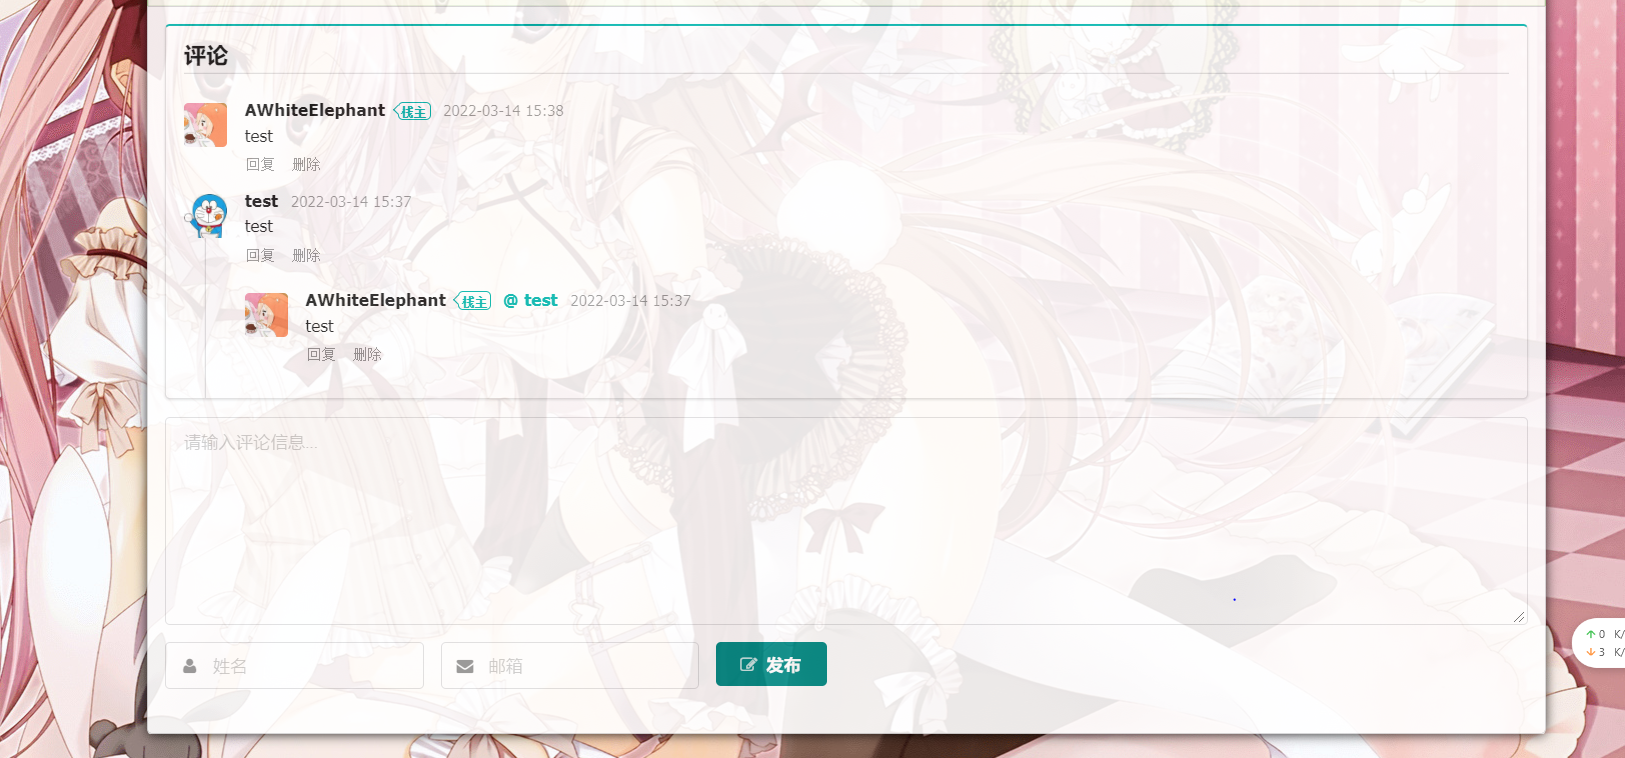
至此,Springboot搭建个人博客详情页面显示开发完成。


评论